AutoClear One Software Manual
Here you will find a step-by-step guide on how to automate your projects.

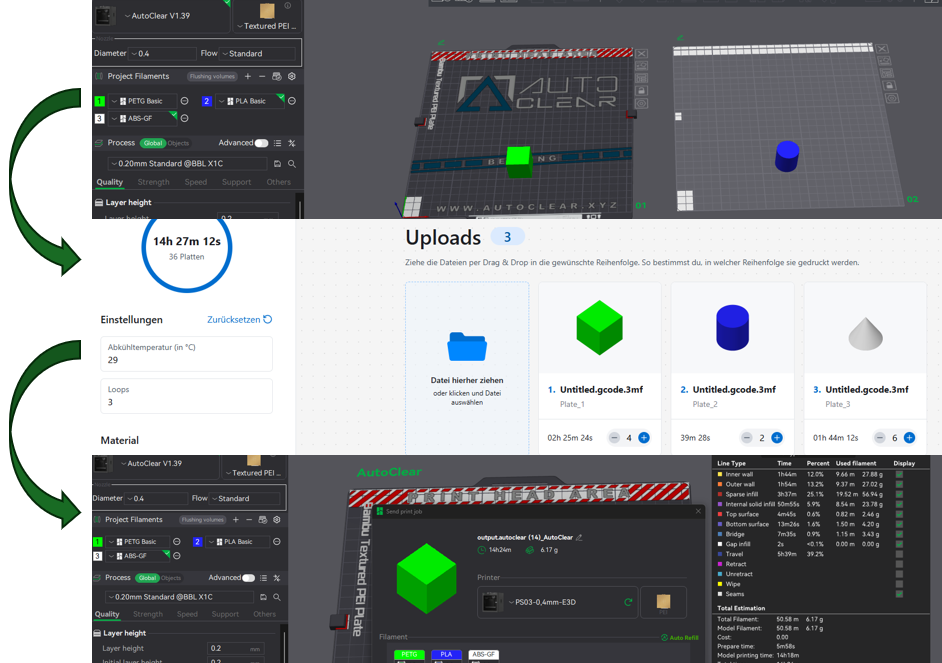
Workflow - Preparing AutoClear Print
Step 1: Prepare print parts in BambuSlicer
Step 2: Automate in the AutoClear app
Step 3: Open and start the file in BambuStudio

Get AutoClear Printer Profile for BambuStudio
📥 Download AutoClear profile HERE .
💡 Note: It is recommended to update Bambu Studio to the latest version first.
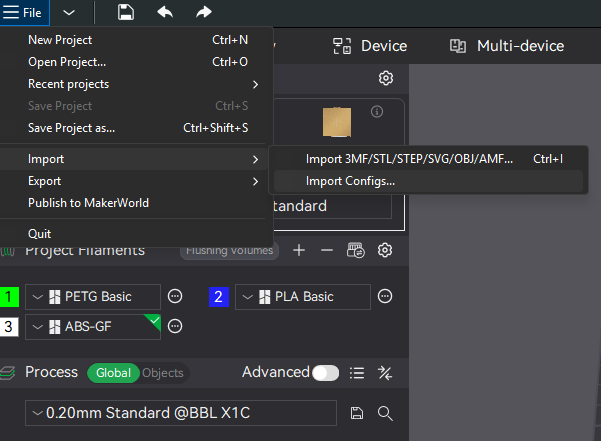
To import the profile into Bambu Studio:
File → Import → Import Configs... Open the ".json" file from the previously downloaded profile

Save files
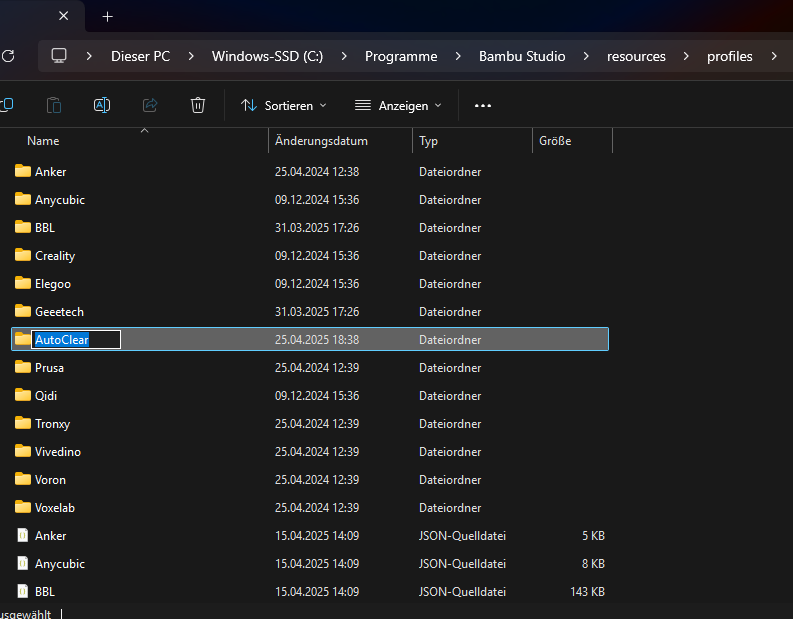
📁 Location for additional files:
Save the additional files (.png and .stl) on your PC in the following directory:
C:\Program Files\Bambu Studio\resources\profiles\
Create a new folder called “AutoClear” and place the files – with the extensions .png and .stl – in this folder .

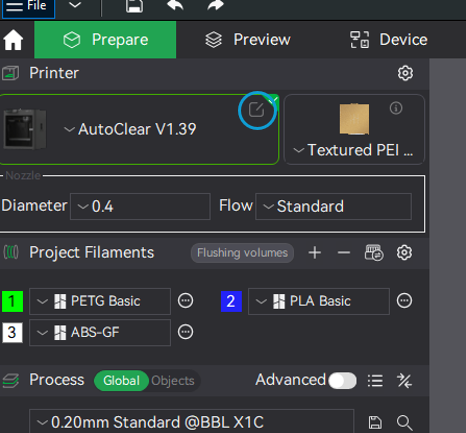
Select printer profile
✅ Select AutoClear profile and be sure to use this profile when printing with AutoClear automation enabled .
💡 Note: The version number of the profile may differ from the one shown .
The profile is compatible with the P1S and the X1C .
🖱️ Next: Click on the blue circled icon to continue with the configuration
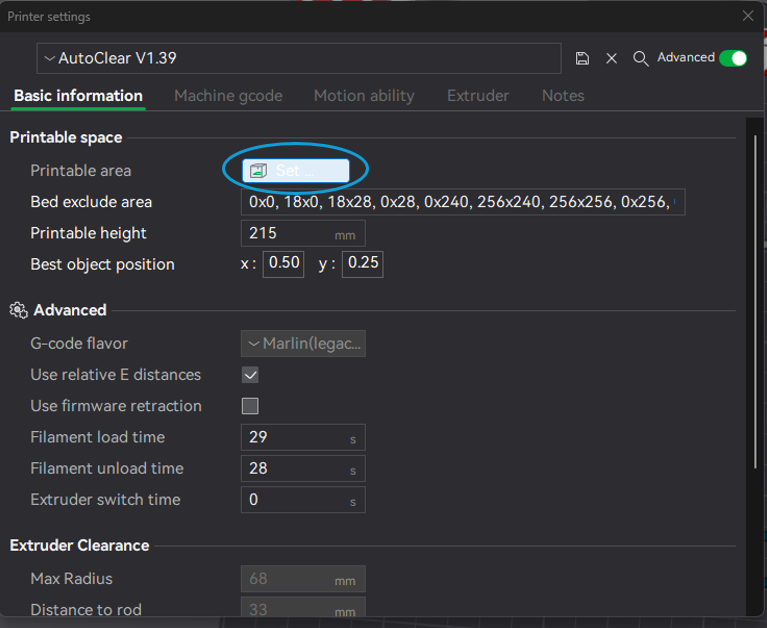
Printer settings
The “Printer Settings” window should now open.
Click the “Set” button to the right of “Printable Area” .
💡Note: If the settings options are not visible, first activate the “Advanced” button in the top right corner of the window.
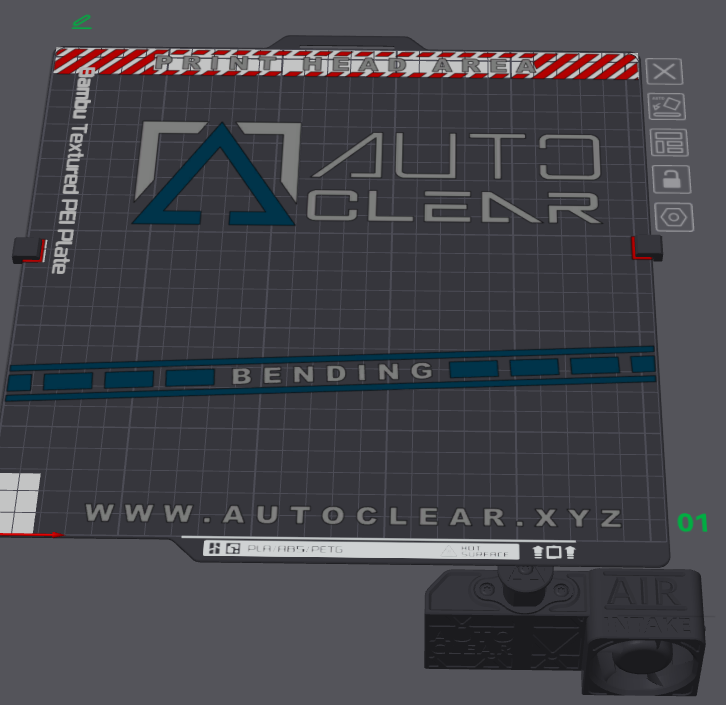
Print bed texture and model load
The “Bed Shape” window will now open.
In this window, please access the previously saved files as shown .
Press the “Load...” button for Texture and open the previously saved .png file .
Then click on the “Load...” button for Model and open the previously saved .stl file .
Confirm with OK and finally save the printer preset .

Slicer Preset
The presets in the slicer are now correctly set for AutoClear .
From now on , when AutoClear is activated (plate with lip to the right ), please always select this new printer preset in the slicer.
💡 Note: The AutoClear preset can be used for both the X1C and the P1S .
If you want to print as usual again , simply select the printer profile you previously used , remove the clips and turn the print plate so that the lip points to the left .
Prepare for printing: Slicer settings
The following describes how to start a print using AutoClear automation step by step .
First, you set the desired printing parameters in the slicer as usual .
If you want to print multiple parts one after the other , place them on separate plates .
Prepare for printing: Slicer Export
Once you are satisfied with the settings , you can export the entire print chain from Bambu Studio as shown in the video .
To do this, first click on “Slice All” and then select “Export All Sliced Files” to export all sliced files.
Prepare for printing: Import into AutoClear software
Next, open the AutoClear app in your browser .
💡 It is recommended to bookmark the AutoClear App website for quick access at any time.
There you can upload the previously exported file and make all the desired settings for the print job list .
This is how you determine the number and order of the parts that should be printed automatically.
After all settings are completed, you must now specify a name for the finished file .
Then click “Download AutoClear file” to download the file.
Send print: open in Bambu Studio
In the next step , open the file downloaded from the AutoClear web app in Bambu Studio .
The program automatically jumps to the “Preview” tab and switching back to the “Prepare” tab is no longer possible – this is normal and intended .
In the “Preview” tab , all prepared parts are now displayed one above the other .
This is because the Bambu Slicer is not designed for automatic print jobs and cannot correctly visualize such files – also completely normal and no cause for concern.
Next, click on “Print Plate” to start automatic printing .
Check the correct AMS assignment and click on “Send” as usual to send the print job to the desired 3D printer .
⚠️ Important: Make sure the AutoClear add-on is correctly installed and working before starting to print.
🚀 Start small – for safe and reliable operation
Before you start mass production , it is important to follow some best practices to ensure a smooth process.
🧪 Perform test print
Before you start large print jobs, it is recommended to perform a test print such as a calibration cube or the 3DBenchy model.
👀 Monitoring the first ejection
When adding a new model to the print job list, closely monitor the initial ejection. Make sure the model is correctly positioned, removed properly, and the slicing settings are correct. It's a good idea to set an alarm or timer to ensure you don't miss the ejection time. Be prepared to shut down the printer if any problems occur during the ejection process.
✅ After successful testing: Start of production
Once a model has been successfully tested and the ejection process is running smoothly, you can put it into series production. Remember to perform regular maintenance and monitor print jobs to ensure consistently high quality.

🎉 Congratulations!
You have completed all the steps to successfully use your AutoClear !
💬 Join our Discord server now if you haven’t already – there you’ll find support, tips and other users who also use AutoClear.